“What do you mean by ‘colour correct’?”
With my photography, I shoot in RAW, which is in essence, a Digital Negative. So just like the film days where you shot film negatives and processed from there, today we shoot in RAW. RAW is as the name suggests, RAW. Everything is unprocessed and has all the colour data there ready to tweak to your needs!
In-camera JPG’s do a fine job, but when you’re working professionally, you need to have control over every image and every scene has its subtle differences.
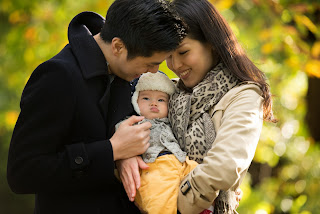
As an example, I thought I would briefly walk you through a photo I took of my cousin, his wife and his new born son.
I used in camera metering to meter this photo at ISO400, f/3.2, 1/250 shot at 165mm. It’s an ‘ok’ photo as it is, the histogram is showing I have managed to retain more or less all of the tonal detail, and it is ready for processing.
First thing is first!
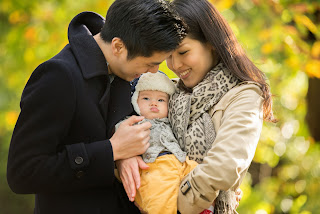
 White Balance… When I shot it, it was set to AutoWB, which chose a WB setting of 4650k. This is fine as it was actually a pretty cloudy day and the looked a bit grey in the scene. However for this photo, the intent was to create a warm autumn feel, hence why I chose the green/brown leaves as a backdrop.
So if I crank up the WB to say 6000k, it adds in more of a yellow tone which pumps up the image a bit more and gives it a very warm feel as opposed to the gloomy grey.

Although the image has all the tonal range, it looks a bit dark, so I would increase my exposure to +0.83 on the exposure slider.

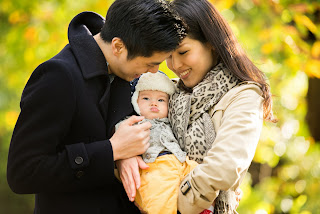
You will see now on her sleeve, we are starting to lose detail as the sun is much harsher on that area than it is anywhere else in the image. Depending on your artistic eye and preference, you could leave it as blown out or recover it with the “Highlight” Slider. As a drastic example, I have reduce Highlights all the way down to -100 to show you can recover most of the detail in the blown out sleeve.

However, doing this flattens out the image a bit, so I will reduce “Highlights”, but not by -100. I have taken it down to -50.

I want to give the image a bit more pump so I will add a bit of contrast to +30, and here is the result of that.
As you can see the image is now looking much more punchy compared to where I first started.
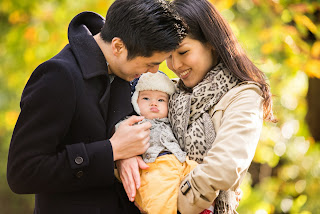
Going back to white balance, as it became more noticeable when I added contrast, their skin tone looked too yellow. So I went back to White Balance to add in a touch of Pink Tint to make the skin look a bit more natural. I have taken it up to +18.

A brought up the Shadows and Blacks a touch and dropped the Whites a little also, added a touch of Clarity for Contrast detail. This is a general practice I do with all my images.
But as you can see from the before/afters, there is a massive change from subtle small tweaks with colour correcting.
This process has to be done with all images that I shoot and this is to ensure consistency throughout.
I hope after reading this it has painted a clearer picture with what is meant by “Colour Correcting” and I hope you feel the extra work involved is worth it for producing better results!


No comments:
Post a Comment